

Click all photos to enlarge.
Upon the strong recommendation of Ben and Brian I decided to pull the trigger and get a pair of Ski Logik Howitzers for my backcountry skiing adventures. Being an unemployed mechanical engineer means I don’t want to spend even more money for a ski shop to mount my skis. Add to that a lot of free time and the “I can build anything” arrogance that comes with being an engineer and it’s not hard to see how Ben and I ended up in my garage about to drill holes in one of the most beautiful pairs of skis I have ever seen. Plus, if a half-baked college sophomore can mount skis, how hard can it really be? Answer: not hard at all…as long as you have a few simple tools, an attention to detail, and a beer you are good to go.
What follows is a write up how I proceeded, but there is a plethora of different ways to mount skis depending on the binding, ski construction, tools available, etc. Googling “ski mounting” will yield more information than anyone cares to read.
Without further ado, here is the list of essential tools:
- Long straight edge
- Clamps
- Utility knife
- Torx 2.0 screw driver
- Silicon-based adhesive
- Center Punch
- Fine point permanent marker
- 5/32” (4.0mm) drill bit
- Scissors
- Masking Tape
- Paper binding templates
These tools are nice to have, but not essential:
- Drill press
- Digital Calipers
- 6” T-square
- Dynafit heel spacer tool
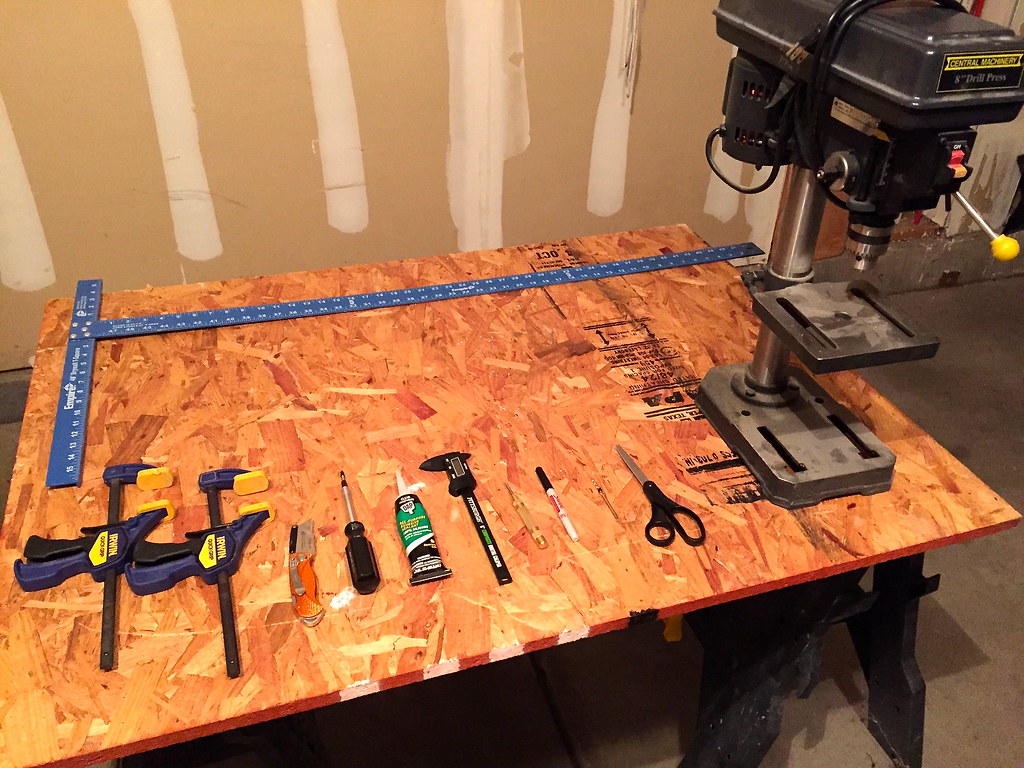
Keeping your tools clean and well organized is highly recommended.
These are the steps I followed:
1. I began by printing off paper binding templates from Teton Gravity Research, which can be found here. I placed the bindings on top of the print out to verify that they matched.
2. Next, and this is essential, open a can of Dale’s Pale Ale and enjoy. Any beer that is stronger than Dale’s is likely to impede your mechanical ability and any beer that is weaker than Dale’s is not really beer.
3. Place masking tape on the top of the ski, along the long axis of the ski, centered over the boot centerline. The tape helps you see the marks you make on the ski and avoids getting permanent marker on your brand new skis.

Masking tape as described in step 3. The dog doesn’t seem to have the attention span for ski mounting!
4. To find center of the ski along the long axis, take a piece of paper about ½” wide and 8” long and wrap it around the ski about 7” in front of the boot centerline and crease the paper on each ski edge. Now fold the paper in half so that the two creases meet. Place the crease back on one ski edge and mark the ski where the paper ends. This is the mid point between the two edges. Repeat this process with a fresh piece of paper about 7” behind the boot centerline. When you place the folded paper back on the ski, be sure to do so in about the same location as you used to make the original crease on the ski edge. This is important because if you move too far from the original spot, the ski width will change and cause an error in your centerline. Now connect the two center marks using a long straight edge (I used a drywall T-square). Repeat on the second ski.
5. I used my boot as a pseudo “fixture” by attaching the Dynafit toe piece to the boot and putting the Dynafit heel piece into the boot with the appropriate spacer tool. I placed this “fixture” on the ski with the center of the boot aligned to the boot centerline marked on the ski.
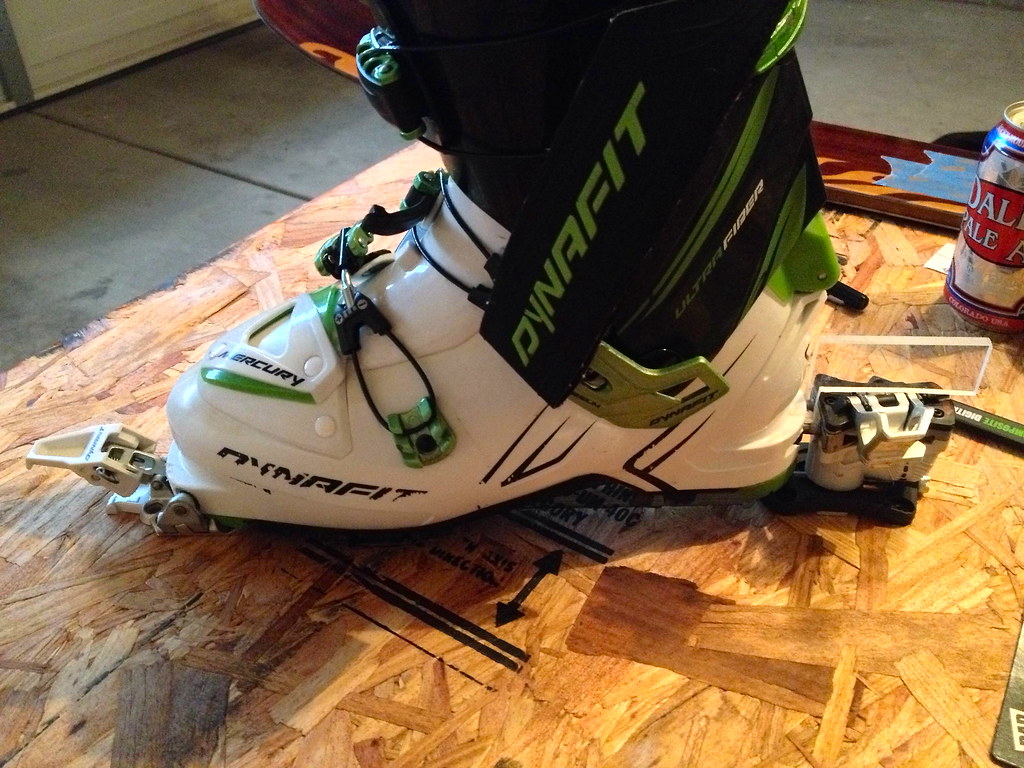
The “fixture” – a boot inserted into the Dynafit binding itself using a spacer tool to accurately space the heel piece.
I then marked the center of the front two holes of the toe piece and the rear two holes of the heel piece.
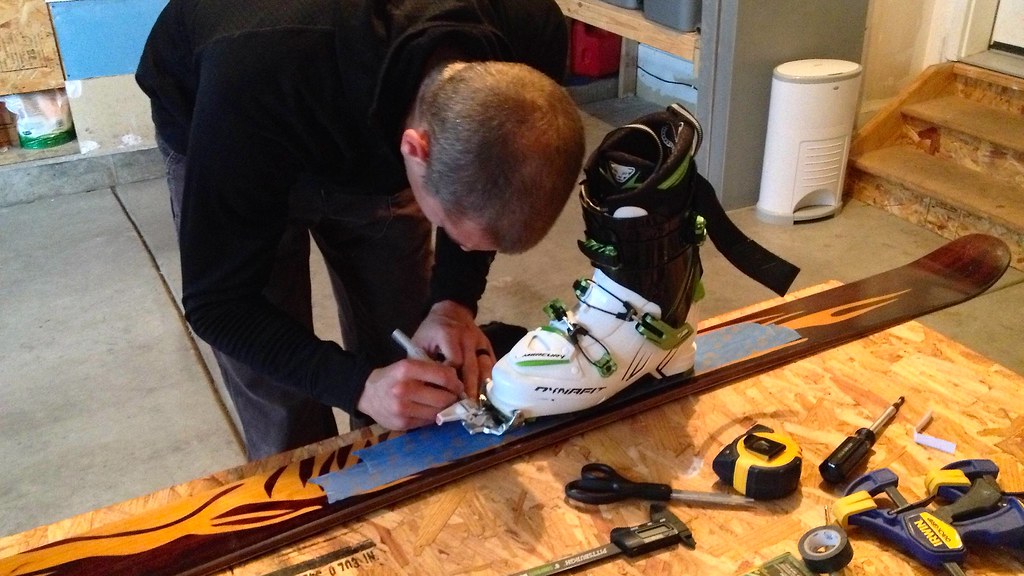
Marking the toe piece…

…and the heel piece.
6. I taped the toe piece paper template on the ski so that the front two holes in the template were aligned with the toe marks I made in Step 5.
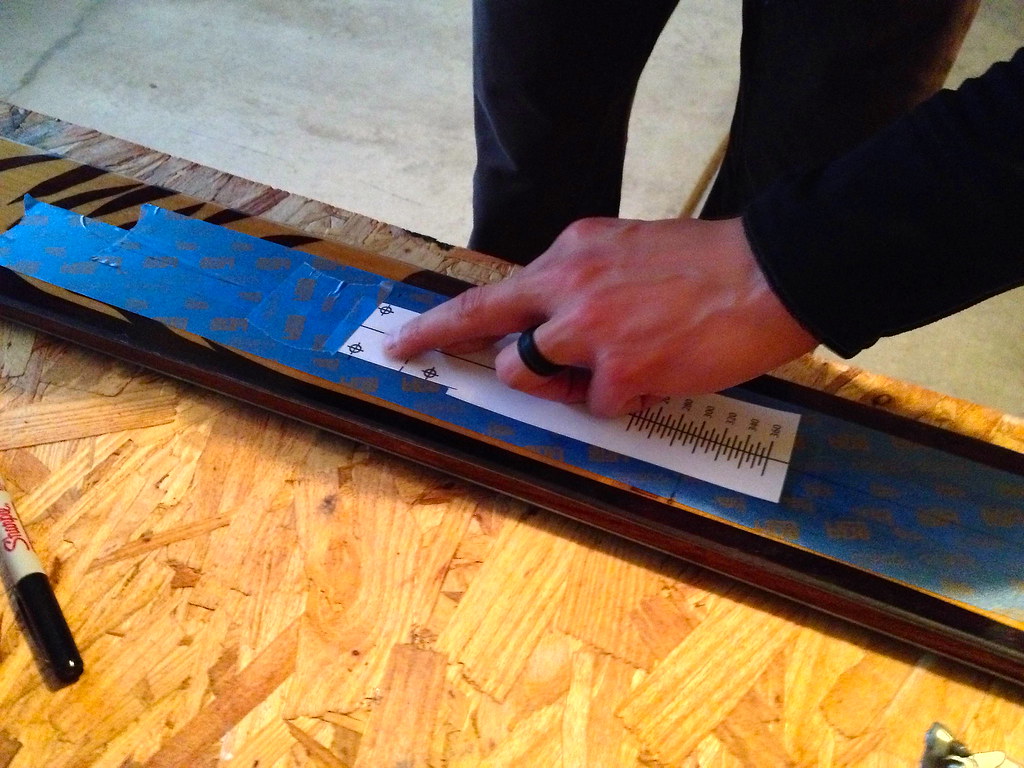
Taping the paper template to the ski. I ensured it was centered by aligning the paper left/right to the centerline I made in Step 4.
7. I taped the heel piece paper template on the ski so that the rear two holes in the template were aligned with the heel marks I made in Step 5. I also ensured that the paper template was centered on the ski by aligning the paper left/right to the centerline I made in Step 4.
8. I re-checked that the paper template aligned to the actual bindings by placing the boot/binding “fixture” back on top of the ski/paper template (measure twice, cut once!)
9. Using a center punch, I marked the center of each of the holes.
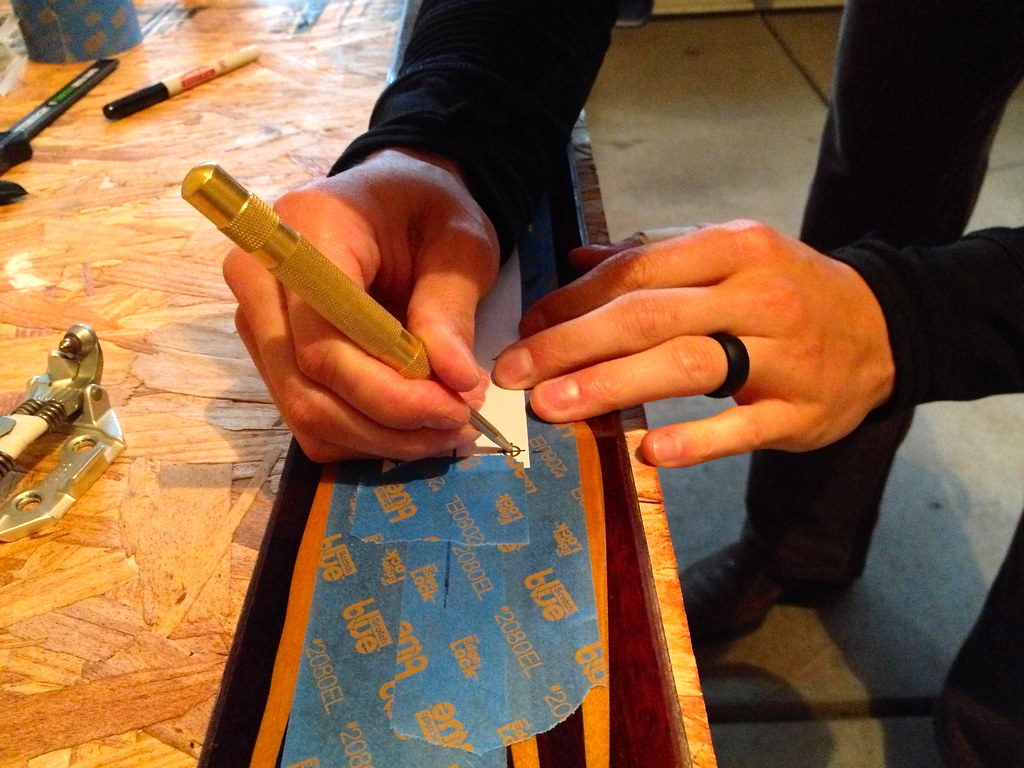
Take your time to mark the exact center of each hole. Precision takes patience.
10. Remove the paper templates and repeat on the second ski.
11. Next, it’s time to drill the holes. It helps if you keep telling yourself that this is nothing more than putting holes in a 2×4…a really beautiful and expensive 2×4! I used a 5/32” (4.0mm) drill bit. Most websites will tell you to use 3.6mm for non-metal skis and 4.1mm for metal skis. I deviated from this advice for two reasons: Ski Logik skis have a very hard wood core which is very difficult to drive screws into if you use the smaller hole, and this is America, we don’t have metric drill bits at the local hardware store. Plus the difference between 5/32” and 4.1mm is the thickness of four human hairs, so who really cares. Wrap some tape around the drill bit 3/8” (9.5mm) from the tip…this will be your depth indicator, pull out when the tape touches the top of the ski.

The scary part. Remember your center punch marks made in Step 9 will help guide the drill bit into the proper location.
12. I screwed the bindings to the skis initially as a “dry mount”, meaning I didn’t use adhesive in the holes. This allows you to take your time and get the screws in vertically. It will also identify any alignment problems or issues with driving the screws (excessive torque) while you still have time to fix the issue.
13. Once the “dry mount” was successful, I un-mounted the skis, put a bit of silicon based adhesive in each hole and re-mounted. Take care to re-align the screws to the threads that were made in each hole in Step 12. Driving the screws this second time around should be much easier than the first time…if it’s not, you probably have the screw cross threaded in the hole. I used silicon based adhesive because it is 100% waterproof which ensures I won’t get water into the core of my ski and rot it out.

The finished product, a thing of beauty.
It sounds like a lot when you read it, but in actuality it only took about an hour and a half and you get to have a few beers. Plus I am confident that my bindings are centered, in the correct location, and all the screws are tight, which is not something I could say if I let “Tanner” at the local ski shop mount my skis for me.
DISCLAIMER: We the authors make no claims that the procedure outlined above, the information, or photos presented here are to be relied upon for safely mounting a pair of Dynafit bindings. If you utilize our mounting guide, you do so at your own risk. Feel free to add comments or ask questions below.
Thanks for taking the time to put this together, Jason. Definitely cool to learn how to do and hopefully it comes in handy for others who may be looking for additional info on how to mount their Dynafits. Looking forward to hearing about how you like the new setup 🙂
Fine tutorial. Unfortunately my attention span has a limit of about 5 steps. Anything in life that takes longer than that to explain, I generally stop paying attention and allow an expert to take care of it. Its not your fault, its just the way I was programmed. In the future, I’ll be taking all Dynafit mounting issues to you, in exchange for some Dale’s of course. Good to see you finally nabbed a pair of Howi’s!
Brian, I understand, the process is a bit long. In an effort to appease you and those of your ilk, I present the following simplified process:
1.) Buy new skis
2.) Drop new skis/bindings/boots at local ski shop
3.) Drink a beer
4.) Pick up new skis/bindings/boots from local ski shop
5.) Drink a beer
DISCLAIMER: this simplified process has a much higher exposure to the “Tanner Effect”, which you are apparently well acquainted with given the two loose screws on your recent Fritschi mount.